
I have been informed by no small number of Frozen aficionados that technically Elsa is the queen so both the ice castle and Arendelle palace belong to her. Try explaining that to a 4-year old.
What does it look like?
The first step was to get an idea what Anna’s castle looks like. Even though I watched Frozen a couple of years ago, I couldn’t tell you what the castle looked like.Time to google. Time to get confused. I found various versions: from Disney-the-movie, Disney-the-plastic-toy, Minecraft, Lego, bat-crazy fan pages, and overzealous cake bakers. They all looked different. Arrgh.
As Krista is fond of saying, “It’s just a representation of something that doesn’t even exist,” so I threw a mental dart and picked a representation. I decided to construct a tower because that existed in every version of the castle I found. And there’s a fountain because it was the only thing I remembered from the movie besides the melting snowman.
Materials and troubles
I made 3 batches of gingerbread dough #3. It was too much dough for the project, but is there ever really too much gingerbread? Extra cookies were baked and enjoyed.For the icing, I added brown food colouring. The brown hides assembly mistakes much better than the white. I make a lot of assembly mistakes.
Since I had run out of brown food colouring, I added cocoa powder, and I think that was the reason it took soooooo loooong for the icing to set: overnight the pieces slumped and came apart. I had to re-glue a lot of pieces. Note to self: use food colouring not cooca powder next time.
I made the model on Friday, baked on Saturday morning, assembled Saturday night, reassembled Sunday, crossed my fingers Sunday night, and decorated Monday afternoon.
Here’s how it went.
 |
| Step 1, as is my usual method, is to make a mockup out of construction paper. I don't really measure, I just cut the paper into thirds and quarters and hope for the best. I should have suspected there would be trouble when the tallest tower wouldn’t stay up. Whatever. Close enough. |
 | |
| When the mockup revealed the castle was a whole bunch of rectangles of different sizes, I realized I had to be organized. That's when I measured and itemized each piece of construction paper. I made a list of each piece (and its dimensions) I would need. I considered the castle to have three "tiers" - front, middle, and back - plus 2 side walls and a back wall. For example, the front layer needed 4 pieces for the arch, two front walls, and two roof pieces. I baked each tier separately and kept them separated and labelled to make the future assembly less confusing. |
 |
| Some assembly required. I didn't know it at the time, but this was going to take forever to harden and I'd end up icing most of the edges again. But it felt like I was off to a good start. |
 |
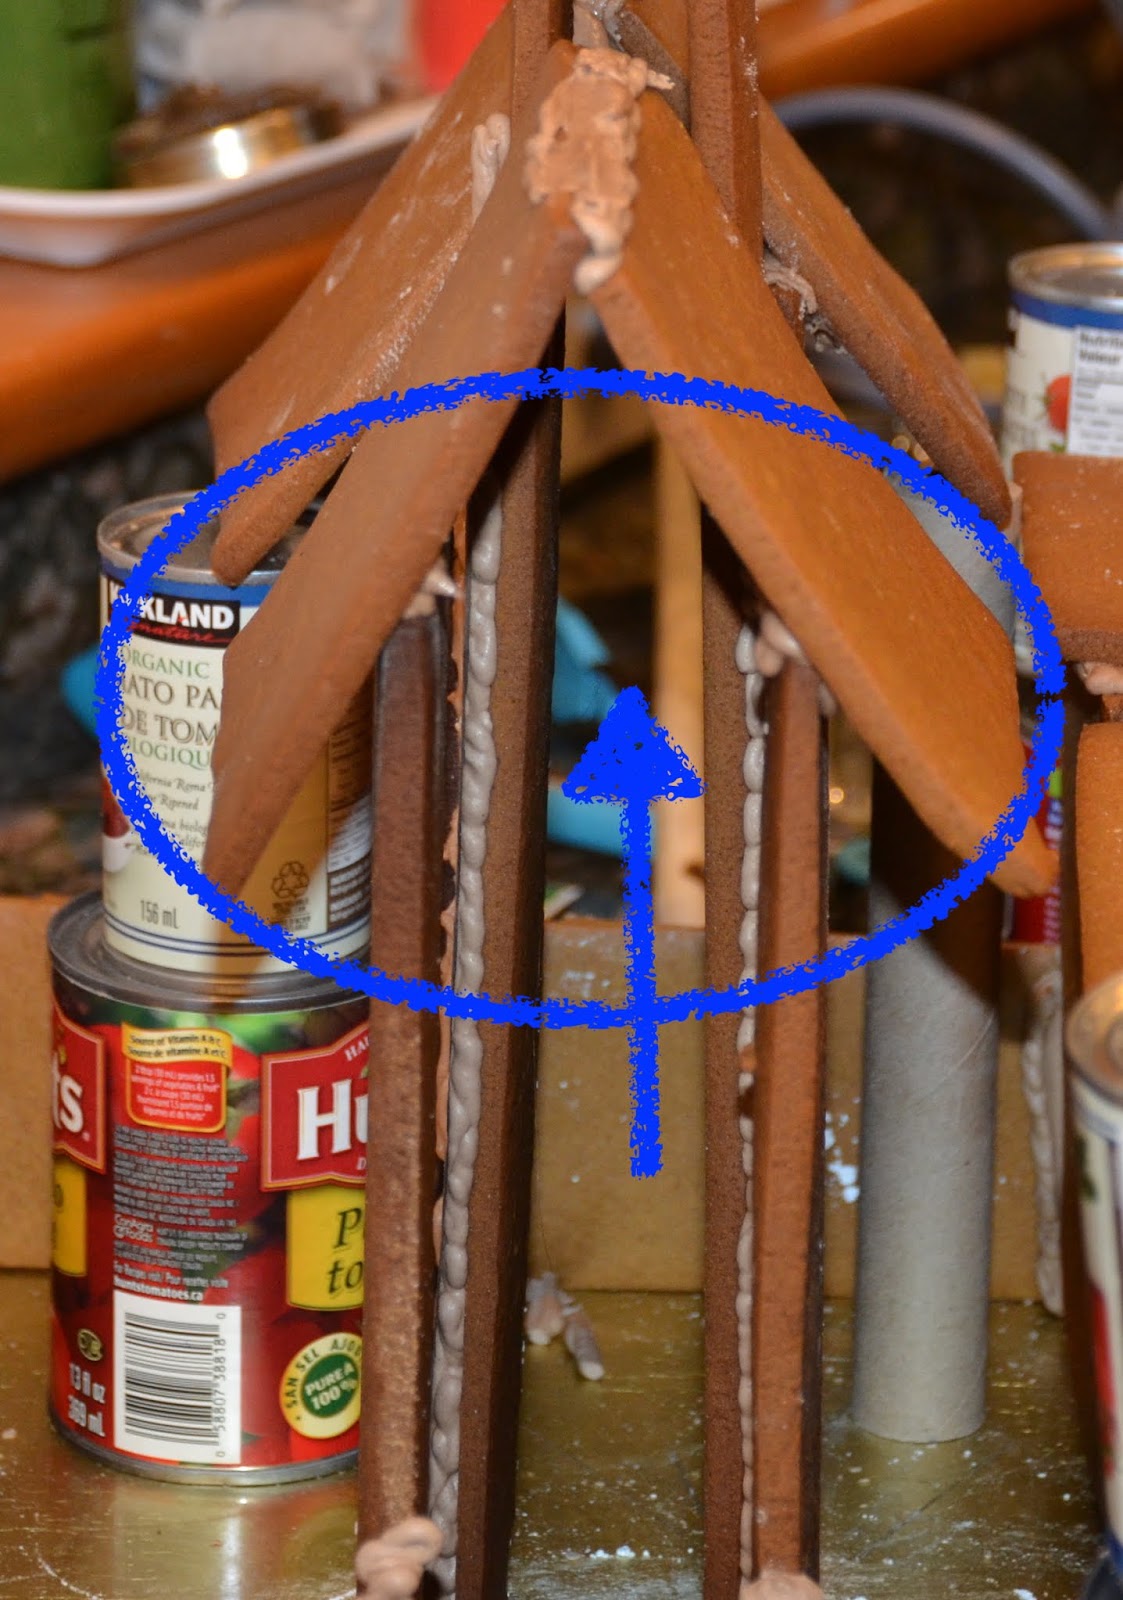
| I used tin cans to support the structure while it dried. That middle tower in tier 3 was way too tall and kept trying to tip over. The height plus the mushy icing led to roof problems which I'll describe in a bit. |
 |
| I made the roof peaks separately. I estimated how wide they had to be at the bottom and made corresponding marks on parchment paper and propped the edges up with cans. The plan was just to pop them on the walls the next day. In retrospect, I could have put them on their sides and reduced tension on the joints. What was I thinking? |
 |
| It went pretty well - until it didn’t. On Sunday morning, the icing had not hardened enough yet. As I tried to position the roof pieces the walls came tumbling down and the roof pieces came apart. Yikes. And rats. On to plan B which is "make this baby stay up whatever it takes." I needed reinforcing pieces to keep the roof up. Luckily Paul hadn't yet eaten all the extra cookies so I had materials to work with. |
 |
| The left tower was fine so I let it be. For middle and right tower, I used extra cross pieces to stabilize the walls. The roof no longer hung over the wall, but at this point I didn't care. |
 |
| In the meantime, I re-glued all the pieces that had come loose. Then I used skewers, chopsticks and tins in a precarious balancing act to support everything until it dried. I wasn't sure the icing would even harden, but I didn't want to think about that. |
 |
| And there we have it. Letting it set. |
 |
| From the 2012 Viking ship project I learned that round shapes are hard to make out of gingerbread. And this is why I love YouTube: A woman who makes baskets out of gingerbread has posted a video on how she does it. Riffing on her advice, I molded the round pieces on cat food tins. (I washed the tins in the dishwasher first - in case you’re coming over at Christmas and are worried the gingerbread will taste like tuna pate.) |
 |
| One tin acts as the base, the other is the form. They were a bit tippy so I only did one at a time. As soon as they came out of the oven I trimmed the ends because they had stretched and warped a bit. |
 |
| Once they were cool, I glued the edges together. Not a perfect circle, but close enough. |
 |
| I also thought it would be easier to make some tower-type shapes out of cones with a cookie base. |
 |
| I stacked the round sections in a staggered pattern and put a top on. The top was a cutout using the cat food tin and was barely big enough. Extra icing hid the problem. |
 |
| Crooked as can be. |
 |
| The fountain pieces were also made with the cat food tins. I cut a bunch of circles, then used a glass to cut the middle out. |
 |
| Stacked with icing. Honestly, it looked better in my mind. |
 |
| But we filled it with jelly beans and it was fine. Some of the fountain soldiers fell off and were eaten before they could be re-glued. It happens. |
 |
| Those pretty little Christmas trees at the front are actually roof supports. Solved the tippy roof problem. 😼 |
 |
| Ready to decorate. |
 |
| Just imagine being 4 or 5 years old and coming to your grandma's house to find all this on the table! |
 |
| The little lady was really into it! |
 |
| I got to decorate half a roof. |
 |
| My original plan was to have these chocolate dormer windows on each roof. For the same reason there aren't more chocolate foil snowmen, there are fewer dormer windows than planned. But who can blame my helpers? Mint chocolate wafers are delicious. |
 |
| Logan really wanted soldiers. He used the gummy bears to stand guard everywhere. |
 |
| Amelia was seriously into decorating her side. Also, Logan wanted to know why all her soldiers appear to be resting on the wall. |
 |
| The chocolate foil snowmen are also standing guard. We started with more, but only two made it to the "glue on" stage. Again, delicious. |
 |
| All in all, an acceptable end product. |
No comments:
Post a Comment